Shortlister offers a variety of options for creating video interviews tailored to your specific needs.
If you have a clear set of interview questions in mind, the most efficient approach is to create an interview from scratch.
Video Tutorial
Step by Step Guide
1. Simply select ‘New’. Select 'create from scratch'


(For Shortlister customers, please skip steps no.2 & 3)
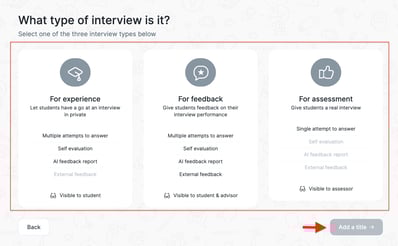
2. Select the interview type required (Shortlist.Me customers only). There are three interview types available. 'For Experience', 'For Feedback', and 'For Assessment'.
- 'For Experience' provides students with a safe place to practice their interview skills and the interview is intended for practice purposes. Students have multiple attempts to answer, they are able to complete self-evaluation, and will receive an AI feedback report. There is no expectation of human feedback being provided from these interviews.
- 'For Feedback' offers all the features of a 'For Experience Interview' with the added expectation of feedback given directly by a member of the team.
- 'For Assessment' interviews are used by all Shortlister customers. For Shortlist.Me customers, these interviews are intended to be used either to assess students or to enable the student to experience a more pressurised style of interview.
- Once selected, click 'Add Title'
3. Your interview title will be visible to both applicants and internally, so select something relevant that everyone will understand. The description will be one of the first things applicants will see. Add anything you feel is relevant for them to know before starting the interview. You can also upload .pdf documents for additional content/context. Once you're satisfied, select 'Add videos'

4. The video section contains the videos surrounding the interview. The welcome video is the first thing they will experience so make this warm and welcoming. The introduction video instructs applicants on what will happen during the interview. The completion video will play once an applicant has finished the interview. Replace the standard videos by clicking each video and either selecting an existing video or recording a new one. Further information is available in our recording guide. Once completed, select 'Set a deadline'.


5. There are two options available for deadlines - fixed and rolling. Fixed deadlines will expire on the given date whilst rolling deadlines allow you to reuse the interview with applicants given a set number of days to complete. Select the option and hit 'Set a deadline'.
Once selected, choose either the number of days to complete or the date and select 'Add questions'.


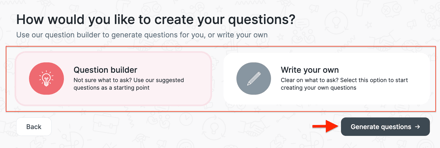
6. The next section offers two options. Question builder creates a five-question interview in one click. Writing your own allows you to start with a blank canvas. Select either 'Question builder' or 'Write your own' and hit either 'Generate questions' or 'Add questions’.
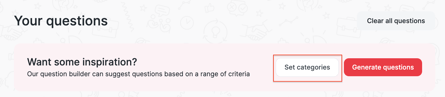
- Adding questions to either option can be completed by selecting categories and/or adding your own questions.
- You can choose from a list of competency and/or strength-based questions by choosing 'Select categories' and clicking on the items you wish to include. This will pull through questions based on these categories.
- Writing your questions is simple. Just click “Add a question” to enter your text in the provided box. Rich text formatting is supported, allowing you to customise your content with bold, italics, underline, lists, links, etc.


7. For Experience and Feedback-type activities, Multiple Attempts is enabled by default, and you can choose from options ranging from Unlimited to 10 attempts.
For Assessment-type activities (including Shortlister customers), an additional checkbox will appear at the top to enable or disable "Allow multiple attempts to answer."
 |
 |
(For more information on the Screen Recording feature ("Question type"), please contact your Account Manager.)
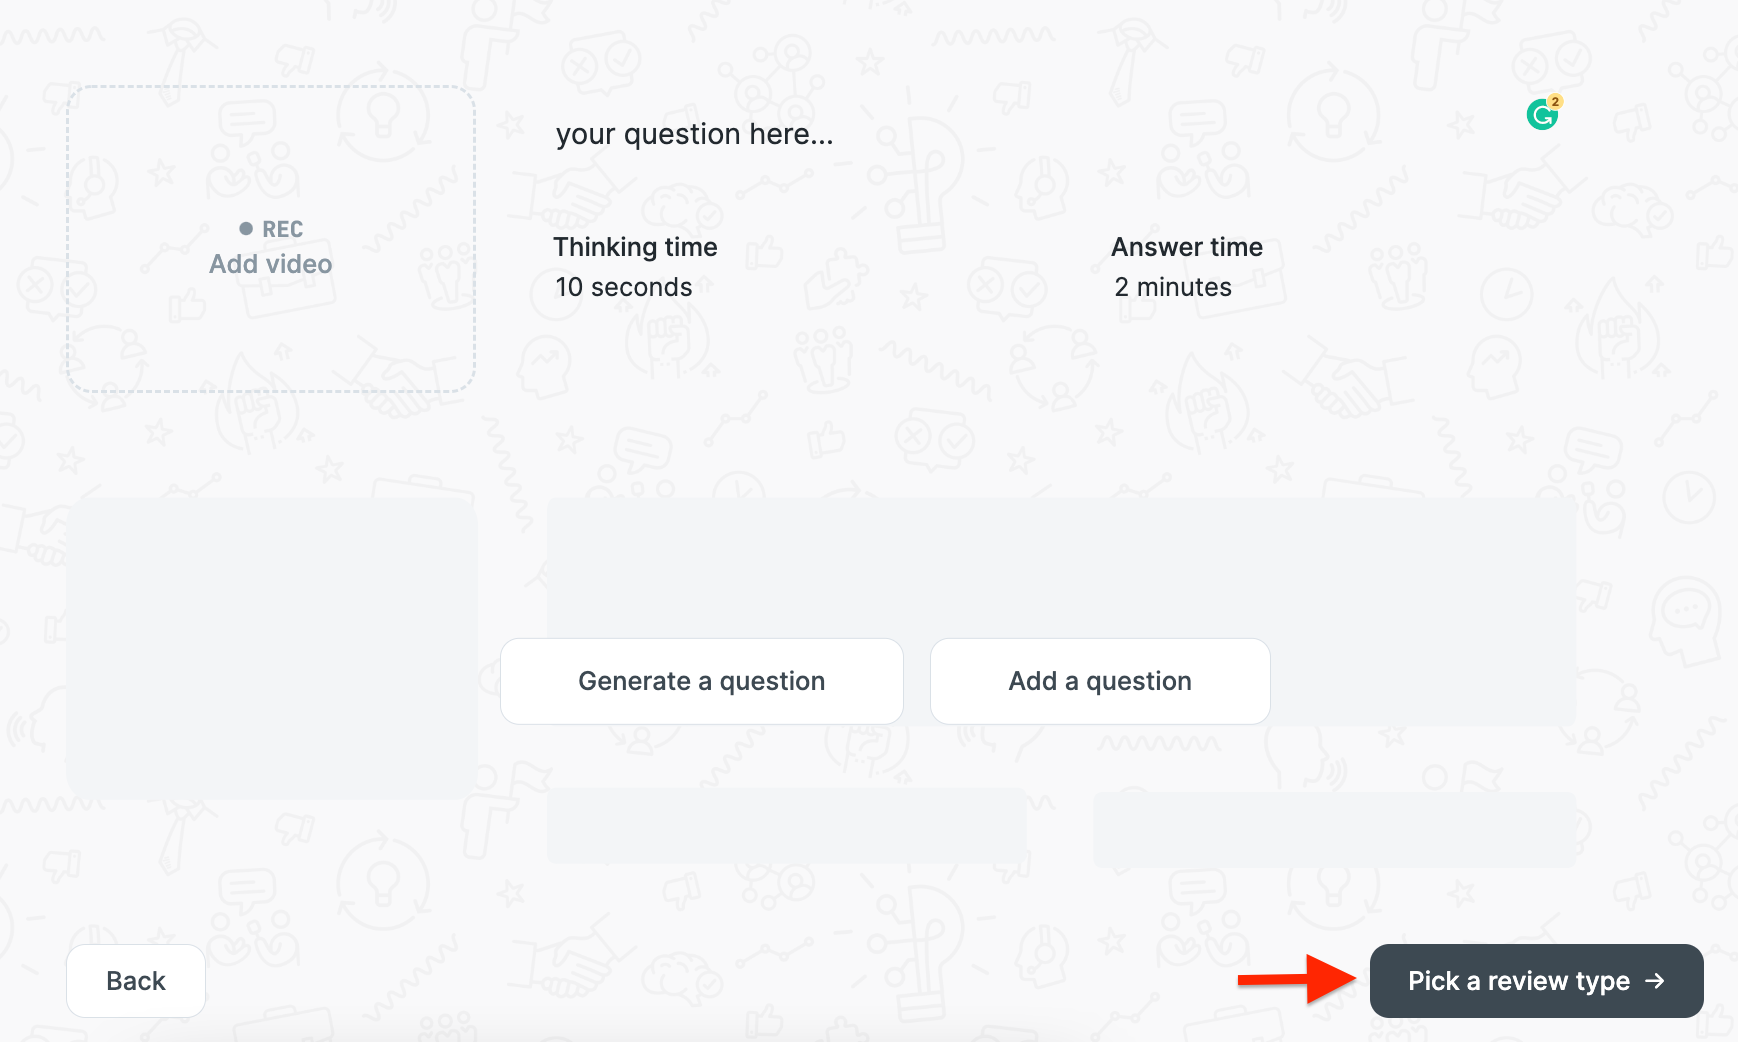
8. After creating your question set, you will have the option to add or replace videos by clicking on the corresponding box next to each question, or you can choose to leave it as is. If no video is assigned to a specific question, the text-to-speech system will automatically read the question aloud to the candidates. If you want further information on how to do this, follow our recording guide
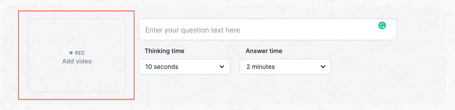
9. Both thinking time and answer time can be amended by clicking the dropdown boxes under each question.

(Shortlister customers can skip step no.11)
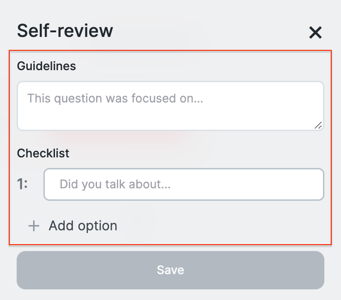
10. Shortlist.Me customers also have the option to add or amend the self-review criteria by selecting 'Edit self-review' to the right of each question. These criteria are visible by applicants after completing each question and act as a checklist. Fill in the relevant information. Additional criteria can be added by selecting 'Add new'. Once you are happy with the criteria select 'Save'.

11. Once you have finalised the questions, please proceed to select 'Manage AI Assistance' if this feature is available to you.

If AI is not available, you will be directed to click the 'Pick a review type' (Shortlister customers) or select the ‘Review panel’ (Shortlist.Me customers).
 |
 |
(For more information on the AI feature, please speak to your Account Manager)
12. (For assessment-type only) Select either 'Rate overall', 'Rate per question', or 'Evaluation rubric'. Then, proceed by clicking on 'Define the rating criteria'.
- Use the + and - keys to select a scale between 3 and 10 to rate applicants. Selecting the 'Add custom definitions' checkbox also allows you to add text descriptions to each number. Press on 'Select the review panel'.

Evaluation Rubric
- Use the + and – keys to set a rating scale from 3 to 10, click the "Add custom definitions" box to add descriptions, and select "Add criteria" to include additional levels of criteria.
- If you want further information on how to do this, follow our Evaluation Rubric rating system.

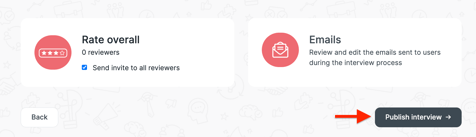
13. Once the rating style is configured, click "Select the review panel," then add individuals who should view the video interviews by selecting "Add reviewers," entering their first name, last name, and email address, and clicking the plus (+) button. Finally, click "Select email templates."


- For activities with AI Assistance and/or the Authenticity Indicator enabled, additional checkboxes will appear to control permission settings.

(For more information on the AI and Authenticity feature, please speak to your Account Manager)
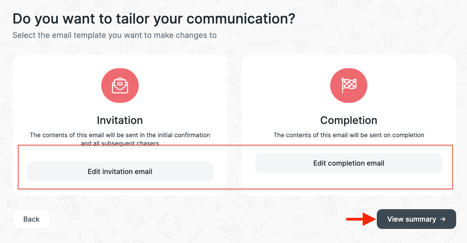
14. Now let’s move on to emails. You can personalise the content and choose the sender to create a fully branded, end-to-end experience. Simply select the email you want to customise and make the necessary edits. Each email type allows for rich text formatting, enabling you to enhance your communications with features such as bold, italics, underlining, lists, links, and more for a polished presentation. Once you're satisfied, click "View summary."
15. The final step is to publish the job and invite interviewees – more on this here