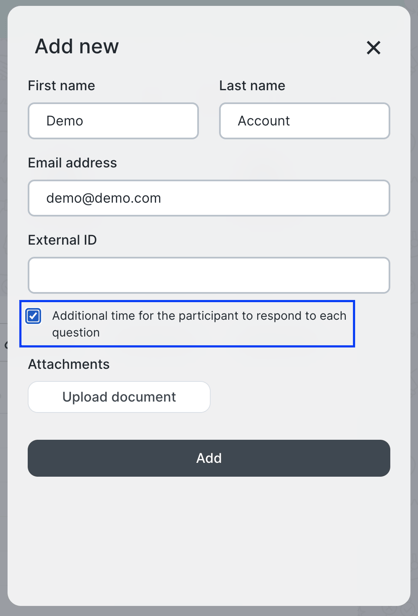
There may be a situation where you are required to assign a candidate/student with additional time to complete their activity for a variety of reasons.
There are a few ways to do this, the first being upon invitation. This will add an extra 25% thinking and answer time onto the original amount that was specified upon activity/interview creation. This would add the extra time onto the invited participant straight away.
See the image below:
The next method to look at is how to add the time to an individual who has already been invited/waiting to be invited.
See the image below:
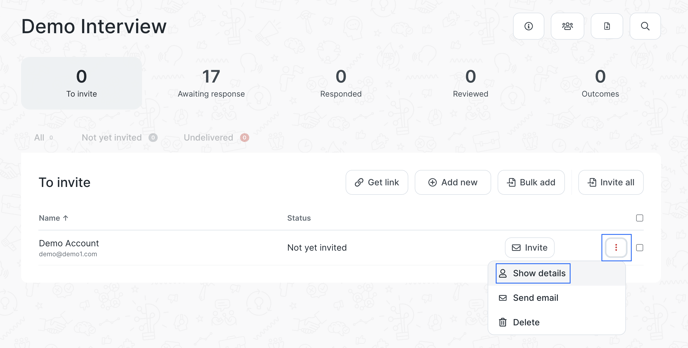
Click the three vertical dots which are usually found on the right-hand side of the screen on the same line as the participants' name(s). Then proceed to click 'Show details'. After this is clicked, the following window will appear: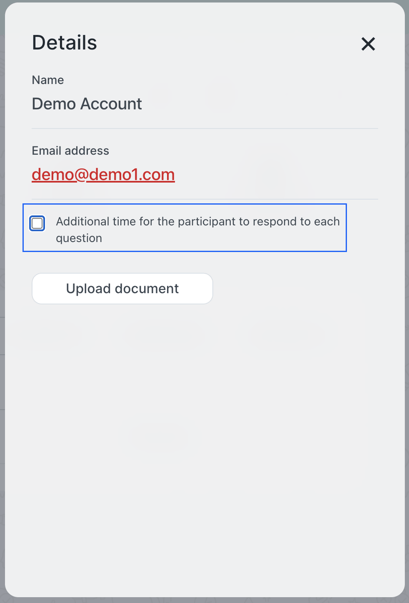
Click the little tick box highlighted in the image above. This would then give the participant an extra 25% thinking and answer time for this specific activity/interview.
To see if this has been successfully applied, it will be displayed by the little clock icon, as shown by the image below: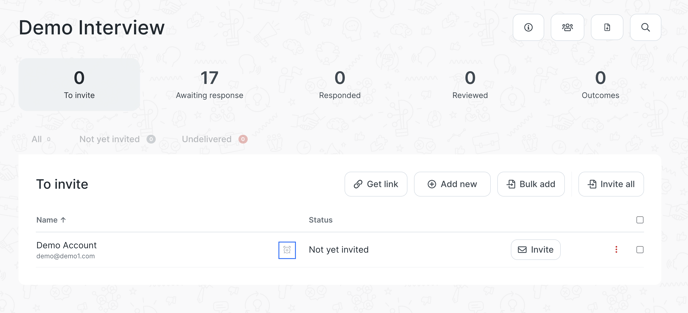
This clock icon signifies that the specific participant has the extra time assigned to them.
There are multiple sections this time addition can be applied, the process is the same however. Look for the three vertical dots and assign the time using the same method described above.