![shortlistme-logo-whiteout-2.png]](https://4019327.fs1.hubspotusercontent-na1.net/hub/4019327/hubfs/Shortlist.Me/shortlistme-logo-whiteout-2.png?height=40&name=shortlistme-logo-whiteout-2.png)
Follow this step-by-step guide to create a fully structured written assessment or questionnaire — complete with a welcome video, deadline, scored or reviewed questions, a review panel, and branded participant emails.
An activity moves through a fixed set of stages, shown as a checklist on the left-hand side of the builder as you work through it:
|
Stage |
What you set up |
|---|---|
|
Details |
Title, description (lobby text), branding, and welcome video |
|
Deadline |
How long participants have to respond |
|
Questions |
Evaluation method and the questions themselves — the core of the questionnaire builder or written assessment |
|
Review |
Who reviews responses and what permissions they have |
|
Emails |
Invitation and completion email templates |
|
Summary |
Final check, then save as a draft or publish |
Each stage is completed in order, and every screen has a Back button, so you can always revisit an earlier step before publishing.
2. Creating a New Activity
2.1 Open the Activities dashboard
From the Activities page, you will see every activity you've created — assessments and interviews alike — along with its status, progress, number of responses to review, and whether it's public.
Click New in the top-right corner to start building a new activity.
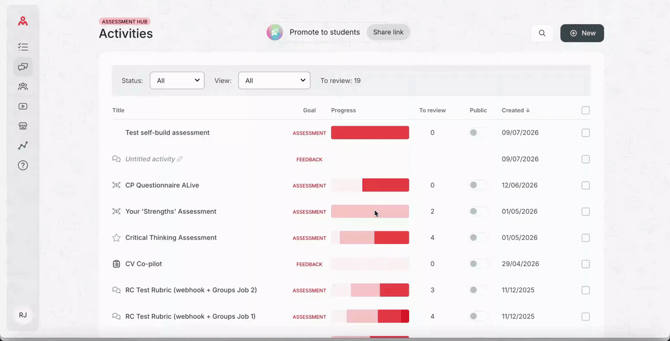
The Activities dashboard, with New in the top-right corner.
2.2 Choose a starting pointThe New Activity screen offers three ways to begin:
- Create from scratch — start with a blank activity and build questions and settings yourself.

The New Activity screen — templates, Create from scratch, and Duplicate a recent activity.
2.3 Select the activity typeAfter choosing Create from scratch, a Select activity type dialog asks how participants will complete the activity:
|
Type |
Description |
|---|---|
|
Interview |
Participants respond using video, audio, presentations, or practical demonstrations. |
|
Assessment |
Participants complete structured questions and tasks within the platform — this is the mode that uses the Questionnaire Builder covered in this guide. |
Select Assessment to continue into the builder.

Select activity type: Interview vs. Assessment.
3. Setting Up the Activity DetailsThe Details stage covers four screens, each with a Back button and a button in the bottom-right to move forward.
3.1 TitleOn “What will your assessment be called?”, enter a name in the text field (e.g. “written assessment”). This title is used wherever the activity is referenced within the platform, including in participant emails. Click Add description to continue.

Naming the assessment.
3.2 DescriptionOn “What do they need to read before making a start?”, write the welcome/lobby copy participants see before they begin. This is where you can outline what’s involved and what the applicant can expect in the assessment.
Formatting controls (bold, italic, underline, links, lists) and an Add field option for merge fields are available in the toolbar. You can also Upload a supporting file here.
Click Branding to continue.
3.3 BrandingOn “Choose branding for this activity”, pick one of two options:
- Use company branding — applies your organisation's default logo, colours, and sender name automatically.
- Use a custom brand — lets you create or select a one-off brand for this activity.
If you choose a custom brand and there isn't one yet, click Add brand to open the Add brand dialog, where you can set a Name, Primary colour, optional Light colour and Dark colour, and upload a Brand logo. Click Create brand to save it, then Add videos to continue.
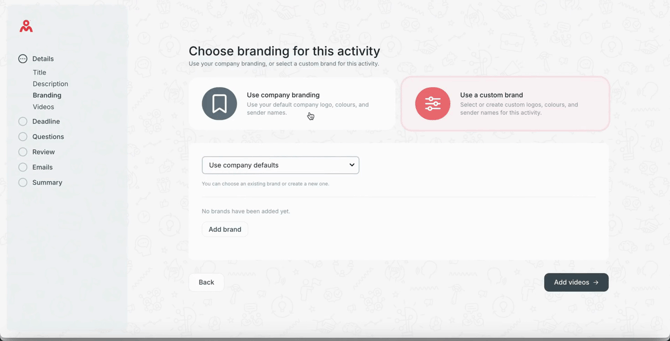
Choosing company branding or a custom brand.
3.4 VideosOn “Choose videos to guide users through the process”, add or select a Welcome video that plays for participants before they start. Use Play to preview the selected video or Switch video to choose a different one or record your own. Click Deadline to move to the next stage.
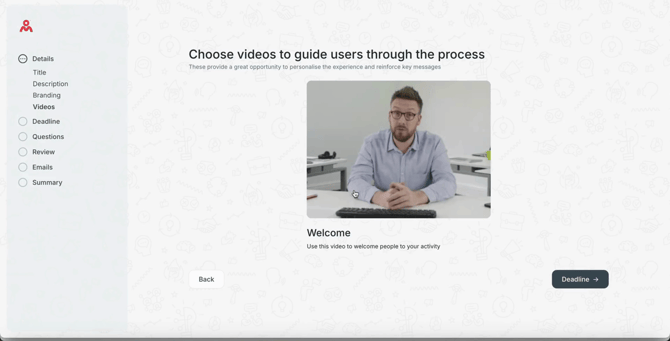
Selecting the welcome video.
4. Setting the DeadlineOn “What type of deadline do you want to use?”, choose between:
- Rolling deadline — the deadline is a number of days counted from when each participant receives their invitation.
- Fixed deadline — every participant shares the same deadline date; once published, this cannot be changed.

Choosing a Rolling or Fixed deadline.
Click Set deadline to continue.
If you selected Rolling deadline, a follow-up screen, “How long will they have to respond?”, appears with a numeric stepper (use + / – or type a number) to set the number of days participants get to respond.
If you selected fixed deadline, a follow up screen will appear asking you to pick a date and time of the fixed deadline.
Click Add questions to move into the Questions stage.
5. Building the QuestionnaireThis is the heart of the Questionnaire Builder: choosing how the assessment is scored, then adding, editing, and ordering questions.
5.1 Choose an evaluation methodOn “How do you want to evaluate?”, choose:
- Manually Reviewed — assessors manually review responses; there is no automatic grading.
- Auto Scored — responses are automatically scored against correct answers and pass criteria you define per question. You will be able to define the correct answers against each question.
Once you choose your evaluation method, click Set questions to open the questions screen.

Choosing Manually Reviewed or Auto Scored.
5.2 Add a questionOn the “Your questions” screen, click + Add question to launch the question builder, a short multi-step dialog. The exact steps depend on the response type you choose.
Step 1 of 4 — Choose how participants will respond
Pick one of two response formats:
- Multiple choice — participants choose from one or more predefined options (e.g. Yes/No, single choice, multiple choice).
- Written response — participants provide a free-text answer (e.g. short answer, long answer, written analysis).
You can combine multiple choice and written response questions into one assessment.
Click Continue.

Step 1 of 4 — choosing the response format.
Step 2 of 4 — Define the question
Type the question text into the rich text editor (formatting and Add field options are available). Click Continue.
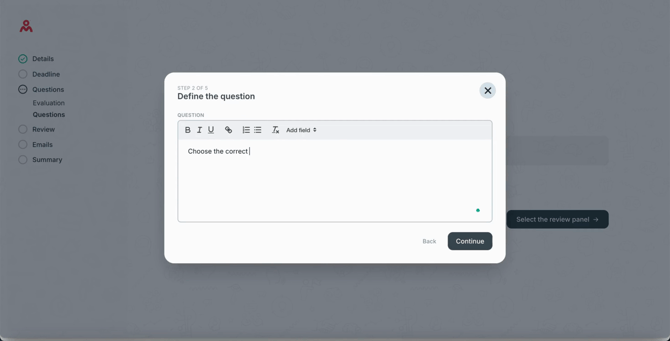
Step 2 of 4 — writing the question text.
Step 3 of 4 — Add media (optional)
Optionally attach a Video, Image, or PDF to accompany the question using the Upload buttons next to each media type; Preview and Delete controls appear once a file is attached. The files, images or videos will appear as the applicant is completing the interview question.
This step can be skipped. Click Continue.
Step 4 of 4 — Multiple choice: Add response options
For multiple choice questions, add one or more response options. For each option, set:
- Response text — the answer text participants will see
- Points awarded — how many points that option is worth. A point awarded is the correct answer. Incorrect responses will have 0 points.
Click + Add response option to add further options.
At the bottom, set a Minimum pass score — the score a participant needs to reach on this question to pass it. Click Add question to save it.

Step 4 of 4 — adding response options, points, and minimum pass score.
Step 4 of 4 — Written response: Field type and settings
For written response questions, configure:
- Response format — Rich Text, Plain Text or Number
- Points awarded — points available for this question. This will only appear for auto scored assessments
- Pre-fill with prompt text — optionally show placeholder guidance text in the answer field. This field is only available with Rich Text in the response format.
- Set a word limit — optionally cap the response length (enter a number of words, e.g. 500). If this is left off, there will be no word limit
- Disable copy/paste — prevent participants from pasting in an answer
- Allow multiple attempts — let participants revise their answer, and retake before submitting
Click Add question to save it.
Optional — Set a time limit
Depending on the question type, a “Set a time limit” step may appear, letting you cap how long a participant has to answer that specific question (None, 15 seconds up to 90 minutes) and whether to Allow multiple attempts. This is optional and can be left as None.
5.3 Manage your questionsEvery question you add appears as a card on the “Your questions” screen, showing its text, response options or format, points, minimum pass score, and any time limit. From each card you can:
- Edit — click the pencil icon to reopen the question builder and change any step
- Delete — click the trash icon to remove the question
- Reorder — use the up/down arrows on the card to change the question order
Click + Add question again to keep building out the questionnaire or assessment — you can mix multiple choice and written response questions freely within the same assessment.

The Your questions screen, showing an added question card.
5.4 Set the overall benchmarkNear the bottom of the questions screen, the Overall benchmark field sets the minimum total score a participant needs across all questions to be considered successful. The screen shows the Max possible total score for reference, and will warn you if your benchmark is set higher than that maximum. Click Select the review panel to continue.
6. Setting Up the Review PanelThis setting can be actioned once the assessment is built, this is optional at the build stage.
On “Who needs to review the responses?”, build the list of people who can see and act on participant submissions:
- Add reviewer — add a single reviewer by email
- Bulk add — add multiple reviewers at once
Each reviewer's row shows their Permissions — for example, whether they can see all reviewers' ratings and comments, rate and flag responses as successful or unsuccessful, and whether they have full AI assistance while reviewing. You must be on the review panel yourself to receive review notifications.

Adding reviewers and setting their permissions.
Click Select email templates to continue.
7. Customizing EmailsOn “Do you want to tailor your communication?”, two email types can be customized:
- Invitation — sent to participants to kick off the activity with a link to access the assessment.
- Completion — sent once a participant finishes..
Click Edit invitation email or Edit completion email to open the template editor for each. The editor includes:
- Sender name and reply-to address
- A rich text message body with an Add field option for merge fields such as [FIRST NAME], [INTERVIEW TITLE], [QUESTION COUNT], [DURATION], [DEADLINE], and — for the completion email — [FEEDBACK LINK]. This will auto populate the fields.
- A live preview of the email as participants will see it.
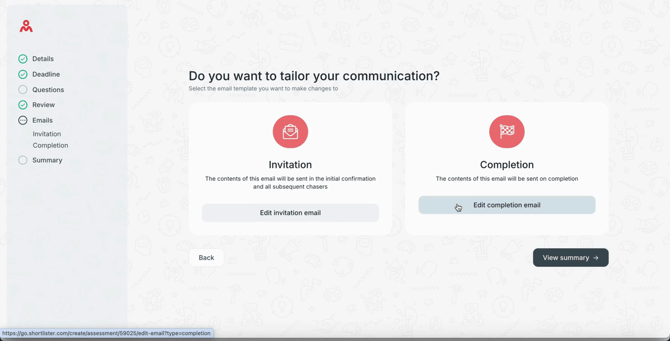
Choosing which email template to tailor.
Click Save template when you're done with each email. Once both are reviewed, click View summary to move to the final stage.
8. Reviewing and PublishingThe Summary screen brings together everything configured in the previous stages, with an Edit link next to each section so you can jump back and make changes without losing your progress:
- Details — title, description, deadline, and branding
- Videos — the welcome video
- Questions — every question, its options/format, and scoring
- Evaluation — Auto scored or Manually reviewed, and number of reviewers
- Emails — confirmation that invitation and completion emails are set, with an option to send invites to all reviewers

The Summary screen, with Edit links back to each stage.
From here you have two options:
- Save as draft — keep working on the activity later without making it available to participants.
- Publish interview — make the activity live and ready to send to participants.
|
Before you publish Double-check the deadline type, question scoring, and review panel permissions — these cannot be changed once the activity is published. |
Publishing an activity opens its dashboard, showing live counts across the participant journey: To invite, Awaiting response, Responded, Reviewed, and Outcomes. Filter tabs let you view All, Not yet invited, Delivered, or Undelivered invitations.

The published activity's dashboard, ready for invitations.
From the To invite tab, add participants using:
- Get link — generate a shareable link to the activity.
- Add new — add one participant at a time via a form capturing First name, Last name, Email address, External ID, Phone number, optional additional response time, and file attachments.
- Bulk add — add multiple participants at once.
Once invited, participants move through the pipeline automatically as they respond, and reviewers assigned in Section 6 can begin rating and flagging submissions from the Review area. Auto scored assessments will move to reviewed once an applicant completes the interview.
Quick Reference: Builder Stages|
Stage |
Key actions |
|---|---|
|
Details |
Set title → write description → choose branding → add welcome video |
|
Deadline |
Choose Rolling or Fixed → set number of days (if rolling) |
|
Questions |
Choose Auto Scored or Manually Reviewed → add questions (response type → question text → optional media → options/settings → optional time limit) → set overall benchmark |
|
Review |
Add reviewer(s) or bulk add → confirm permissions |
|
Emails |
Edit invitation email → edit completion email → save templates |
|
Summary |
Review each section → Save as draft or Publish interview |